
Teams Webhook Setup Guide
Purpose
This document outlines the standardized steps for setting up a webhook integration between Microsoft Teams and Mizo, enabling Mizo to receive notifications and process messages from your Teams channels.
Section 1 – Creating the Webhook in Microsoft Teams
Step 1: Create a new Workflow
Make sure you already have the Workflows app added to your Teams setup.
- You can add it easily through the Apps section.
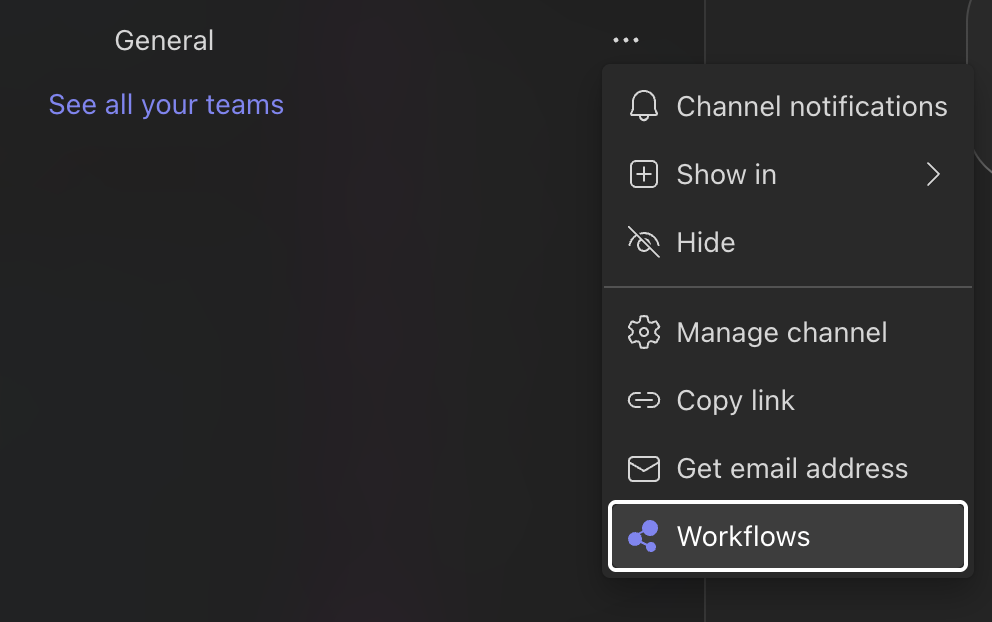
Create a webhook directly in a channel:
- Go to the Teams channel where you want to receive notifications.
- Click on the … (more options) next to the channel name.
- Select Workflows.
We suggest using Send webhook alerts to a channel. You can also create and configure your own with Workflow builder if you need more customizations.
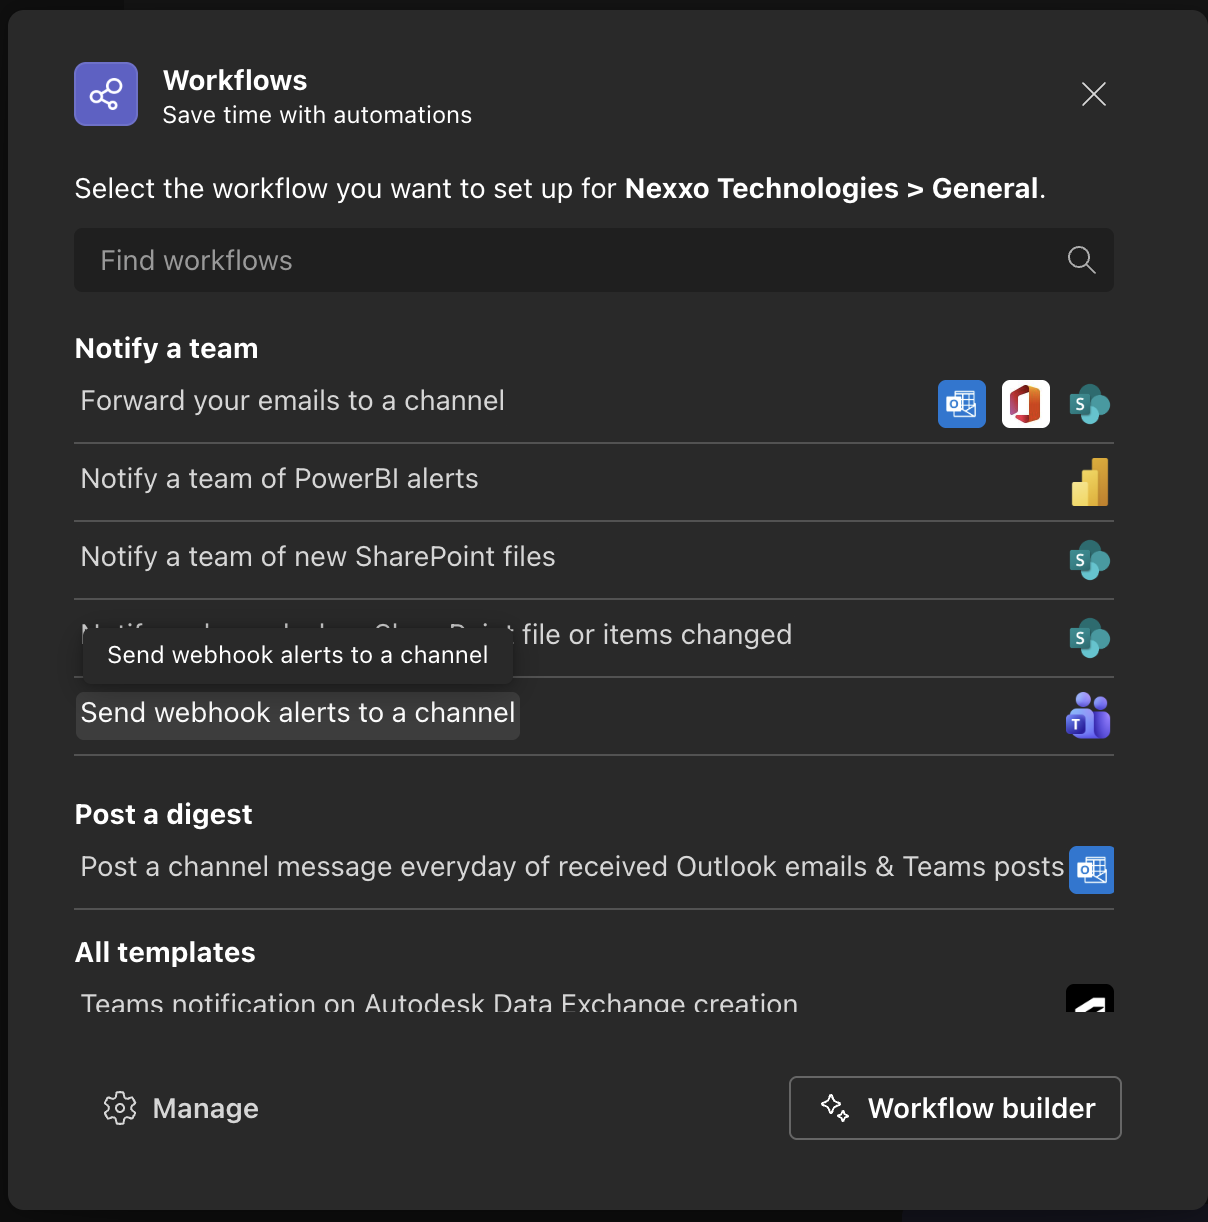
Follow the steps proposed until the Workflow is configured and a URL is displayed to you.
Copy that URL somewhere safe and go to Section 2.
Alternatively, you can create a webhook on a chat instead.
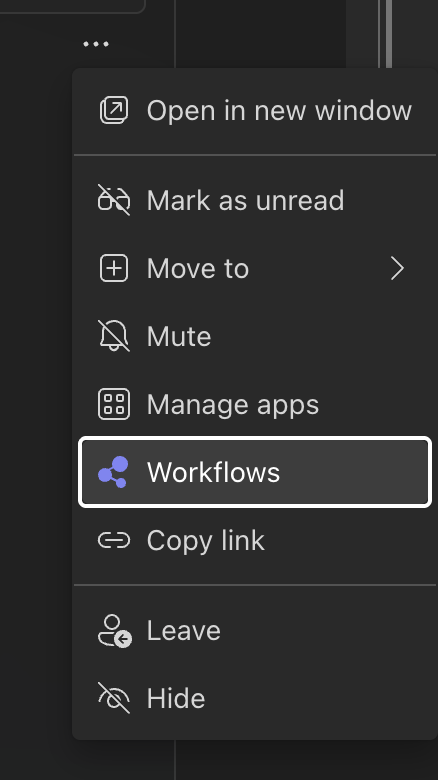
- Go to the Teams chat where you want to receive notifications.
- Click on the … (more options) next to the chat name.
- Select Workflows.
- We suggest using Send webhook alerts to a chat. You can also create and configure your own with Workflow builder if you need more customizations.
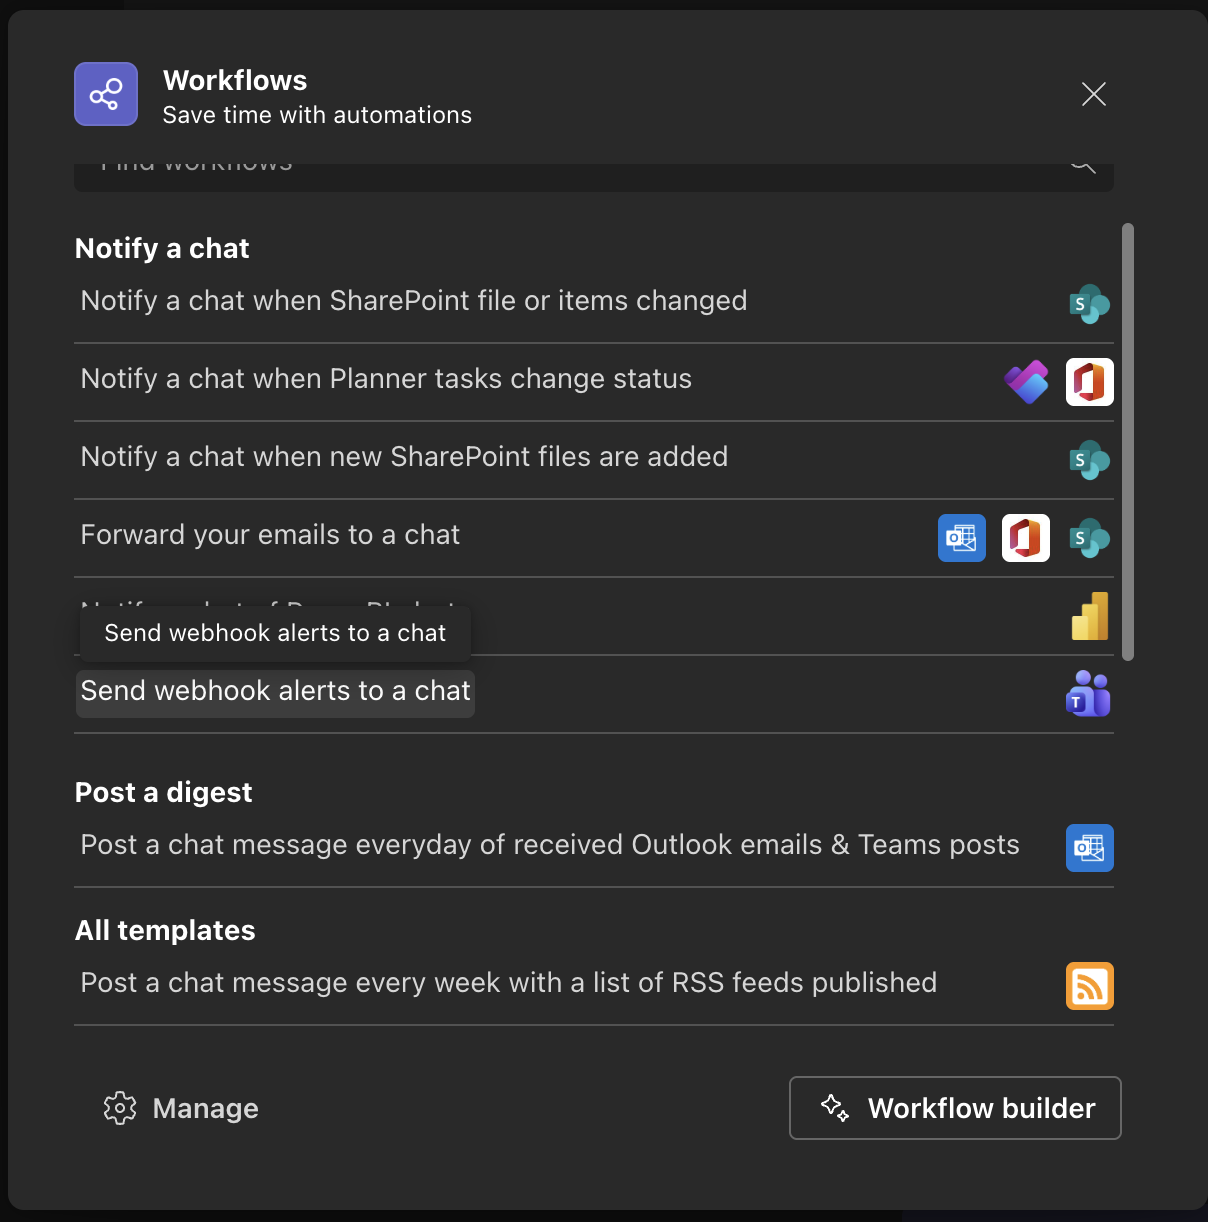
- Follow the steps proposed until the Workflow is configured and a URL is displayed to you.
- Copy that URL somewhere safe and go to Section 2.
CAUTION
The webhook URL contains sensitive information. Store it securely and never share it publicly. If the URL is compromised, you should delete and recreate the webhook.
Section 2 – Add the webhook to the Mizo Console
Step 1: Configure Integration in Mizo
- Log into the Mizo console.
- In the left-hand menu, go to Integrations.
- Select Teams from the list.
Step 2: Configure the Teams webhook
- Enable the notifications switch.
- This is required for the notifications to be sent. You can turn it off at any time to stop the notifications without losing the rest of the configuration.
- Choose your urgency level:
- By default notifications will be sent for High urgency tickets. You can also choose Medium. These levels are based on how the Mizo agent triages the ticket.
- Webhook URL:
- Paste the webhook URL that you have generated in Teams.
- Test the connection.
- Click on the test connection button. It will send a test message to the configured webhook.
INFO
It may take a few seconds for Mizo to test the webhook and return a response. As long as you receive a message through Teams, the connection will work.
Troubleshooting
Webhook Not Receiving Messages
- Verify Webhook Status:
- Go back to Teams, check your workflow and ensure the connection is active.
- Check Webhook URL:
- Ensure the URL in Mizo matches exactly the URL from Teams.
- URLs are case-sensitive and must be copied completely.
- In your Teams’s workflow page, you can click on the edit option of the webhook step to find the URL.