
HaloPSA Setup Guide
Purpose
This document outlines the standardized steps for setting up an API integration between HaloPSA and Mizo, including agent, application and custom ticket tab creation.
Section 1 – Setting up the base configuration in Mizo Console
Step 1: Configure Integration in Mizo
- Log into the Mizo console.
- In the left-hand menu, go to Integrations.
- Select HaloPSA from the list.
Step 2: Enter HaloPSA configuration
- Instance URL:
- Your HaloPSA instance URL (e.g.,
https://{{your_company_name}}.halopsa.com)
- Your HaloPSA instance URL (e.g.,
- Client ID:
- Will be covered in section 2.
- Client Secret:
- Will be covered in section 2.
- Mizo Ticket Tab Secret:
- Will be covered in section 2.
- Interface Language:
- Select your preferred language.
Keep the configuration open in a browser tab, as it will be modified in the next sections.
Section 2 – Creating the HaloPSA Mizo Agent
Step 1: Log in to HaloPSA
- Sign in to your HaloPSA instance using an account with Administrator rights.
Step 2: Create a Security Role for the Integration
- Navigate to Configuration > Teams & Agents > Agents.
- Click New to add a new agent.
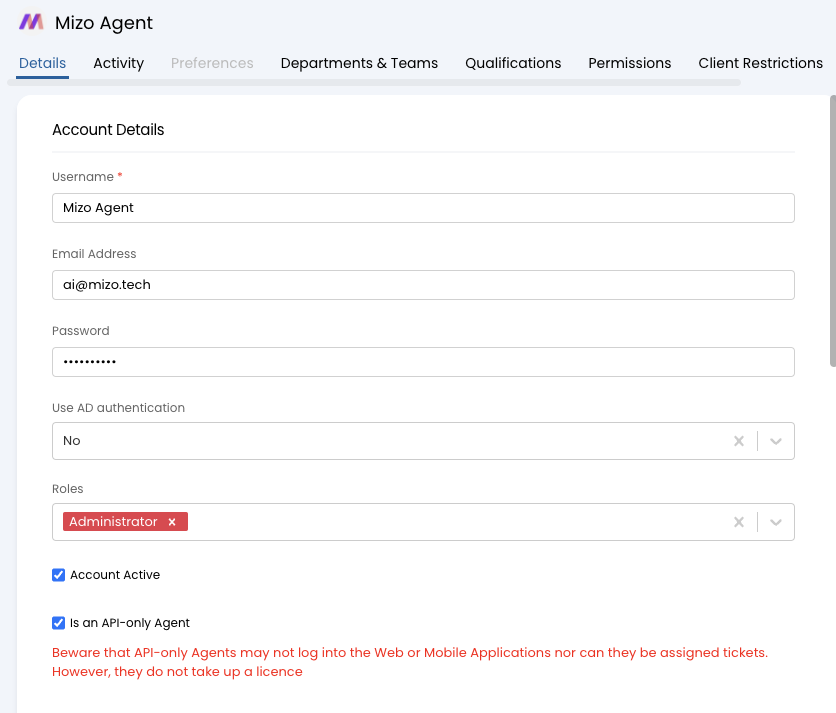
- Configure the new agent (fields not listed below should keep their default value):
- Username:
Mizo Agent - Password: Keep blank.
- Use AD authentication: No
- Roles: Administrator (This doesn’t give admin rights to Mizo, permissions are set later).
- Is an API-only Agent: Yes
- First Name:
Mizo - Surname:
Agent - Initials:
MZ - Default Team: *No Default Team*
- Work Hours: 24 Hours
- Username:
- Click Save.
Step 3: Add a new Application
This application allows Mizo to view and update tickets
Navigate to Configuration > Integrations > HaloPSA API > Applications > View Applications.
Click New to add a new application.
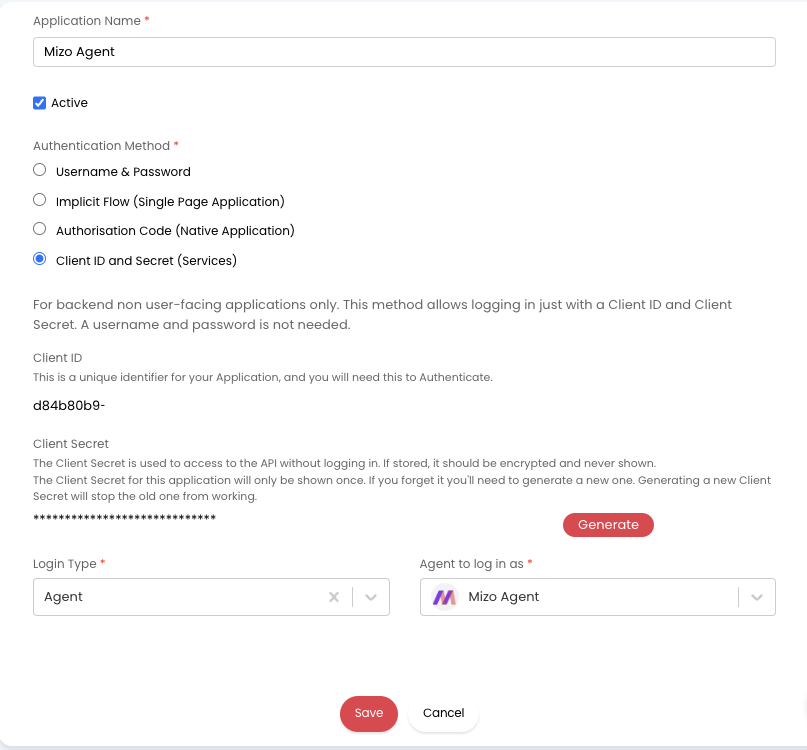
Configure the application:
Application Name: Mizo Agent
Authentication Method: Client ID and Secret (Services)
Client ID and Client Secret: Copy the values and paste them in your HaloPSA Integration Configuration in the Mizo Console.
Login Type: Agent
Agent to log in as: Mizo Agent
In the Permissions tab, set the following permissions:
Permission Comments all:teams read:tickets edit:tickets read:calendar Needed for dispatch edit:calendar Needed for dispatch read:customers Needed for ticket attribution edit:customers Needed for ticket attribution read:contracts edit:contracts read:items edit:items read:timesheet Needed for dispatch edit:timesheet Needed for dispatch read:kb edit:kb read:assets edit:assets Click Save.
Step 4: Configure the “Mizo resolve” actions
- Navigate to Configuration > Tickets > Actions.
- Click New.
- Configure the Action:
- Outcome Description:
Mizo resolve. This is character sensitive, make sure to copy it exactly - Button Name:
Mizo resolve - Status After Action : Choose your “Closed/Resolved” ticket action - Mizo will automatically use this action to close tickets it resolves.
- Outcome Description:
- Save and click Edit. Under the Details tab:
- Enable Action is visible checkbox
- Enable Action is visible outside of Workflows checkbox
- Enable Hide from Ticket Header checkbox
- Enable Hide from User checkbox
- Under the Field List tab
- Add the Private Note field
- Click Save
Step 5: Create the Custom Mizo Tab
This tab will display Mizo’s analysis and actions
- Navigate to Configuration > Custom Objects > Custom Tabs.
- Click New to create the new custom tab.
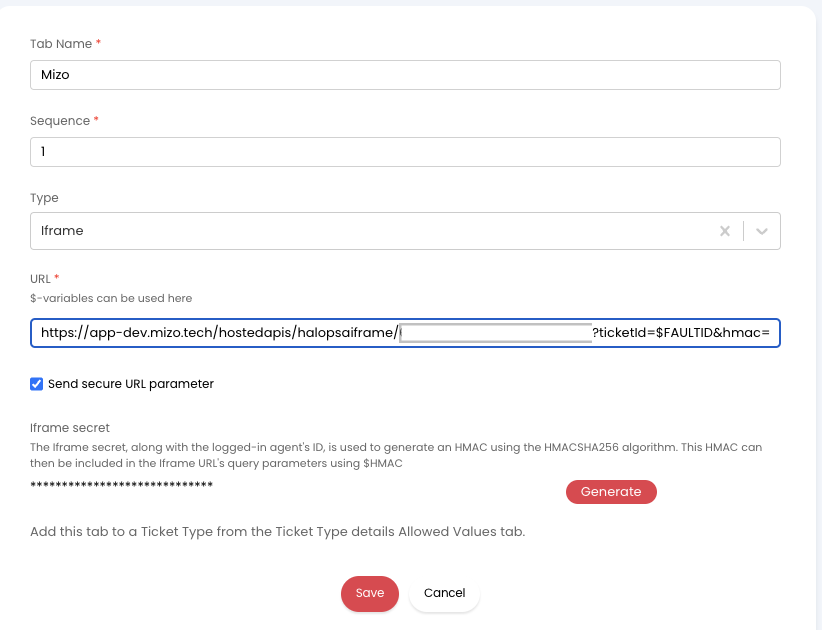
- Configure the custom tab:
- Tab Name:
Mizo - Sequence: 1 (or higher if you want it to be displayed after other tabs)
- Type: Iframe
- Url: Copy the Mizo Ticket Tab Url field from the Mizo Console and paste it here.
- Check the Send secure URL parameter box.
- Iframe secret: Copy and paste it in your HaloPSA Integration Configuration in the Mizo Console.
- Tab Name:
- Click Save.
Step 5: Configure Ticket Types for Mizo
- Navigate to Configuration > Tickets > Ticket Types.
- Click on a ticket type you want to add the Mizo tab for and click Edit.
- We recommend selecting at least your ticket types equivalent to the [ITIL](https://iseoblue.com/post/itil-ticket-types-explored/)
Triage,Incident,Change Request,Service Request, andProblemticket types
- We recommend selecting at least your ticket types equivalent to the [ITIL](https://iseoblue.com/post/itil-ticket-types-explored/)
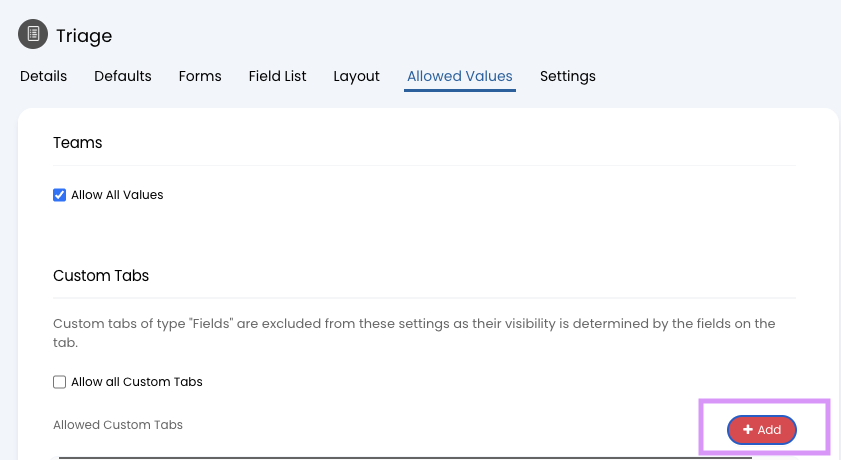
- Configure the ticket type:
- Open the Allowed Values tab.
- Scroll down to the Custom Tabs section.
- Click Add.
- Select Mizo.
- Click Save.
- Click Save at the top.
- Repeat steps 2-4 for each other ticket type you want to configure.
Section 3 – Complete the HaloPSA Integration Configuration in Mizo
Step 1: Validate the HaloPSA Integration
- Go back to your HaloPSA Integration Configuration in the Mizo Console.
- Click Save.
- A green message should appear, validating that the HaloPSA API is properly reached.
- If a red error message appears, validate that your values are correct (regenerating secrets if needed).
- Scroll down to the Scope section and enable all the ticket types you configured in Step 5 of Section 2 and click Save.
- (Optional) Also set the Assignable Ticket Types that Mizo should consider for assignation.
- (Optional) On the left menu, go to the Automation page and check the automation features you want to be enabled.
Section 4 - Create the WebHook to process tickets
Step 1: Configure the certificate
- In the WebHook Configuration section in the Mizo console, click on the Generate certificate button. This should download a
pfxfile on your computer. - Copy the password below the button.
- Open the new certificate page of HaloPSA:
- Go back to HaloPSA.
- Navigate to Configuration > Advanced Settings.
- Scroll down until you see a Certificates button and click it.
- Click New.
- Configure the certificate:
- Name: Mizo
- Pfx: Upload the
pfxfile you just downloaded. - Password: Paste the password copied in step 1.2.
- Click Save.

Step 2: Configure the WebHook
- Navigate to Configuration > Integrations > WebHooks.
- Click New.
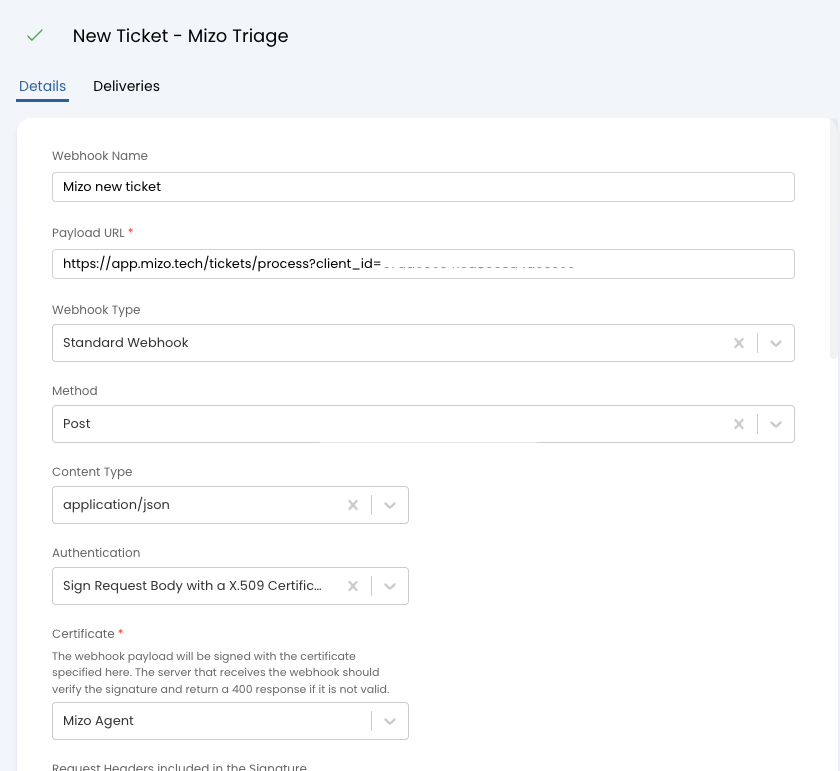
- Configure the WebHook:
WebHook name:
Mizo ticket webhookPayload URL: Copy the Mizo WebHook URL displayed above the button you clicked on step 1 and paste it here.
Authentication: Sign Request Body with a X.509 Certificate
Certificate: Mizo
In the Events section and click Add. the following events:\
Event Name Notes New Ticket LoggedTicket Status ChangedTicket ChangedField: Client (Or Customer), Change context:Value changed,Rule type:To any valueAction added by AgentAdd the actions equivalent to: 1. Logging a Private Note on the ticket 2. Sending an Email to the customer INFO
- N.B. In the end, you should have 5 different events that trigger Mizo Webhooks. The
Ticket Updatedevent in the image below represents theTicket Changedtrigger above. HaloPSA changes the name on updated

- N.B. In the end, you should have 5 different events that trigger Mizo Webhooks. The
Click Save.
Section 6 - Test the complete setup
Step 1: Create a new ticket
- At the top of any page on HaloPSA, click New Ticket.
- Choose a Ticket Type that has been configured in section 2.4.
- Fill the rest of the fields with any information.
Step 2: Verify if the WebHook detected the new ticket
- Navigate to Configuration > Integrations > WebHooks.
- Select the Mizo new ticket WebHook.
- Open the Deliveries tab.
- Make sure the ticket you created is listed here and that the response is 200.
- If it is not the case, you should contact Mizo’s technical support.
Step 3: Validate the ticket
- Navigate to Service Desk > Triage.
- Select the ticket you created.
- Open up the Mizo tab.
- Information about the ticket generated by Mizo should be shown.
- If an error pops up, you should contact Mizo’s technical support.